Intro
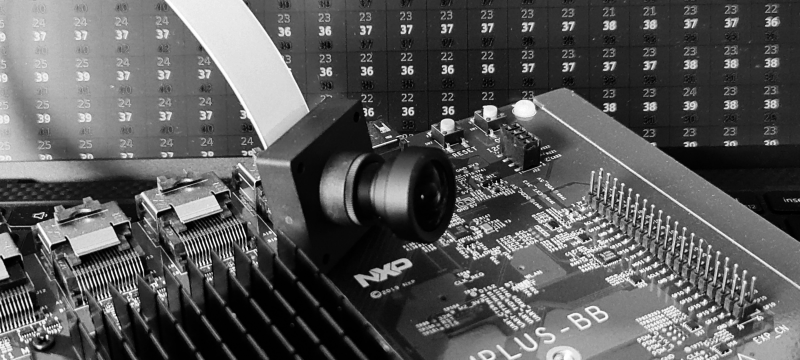
A new toy arrived: i.MX 8M Plus Evaluation board from NXP with a Basler 5MP camera module. This is going to be fun. Box opened. Cables connected. Power on. LEDs blinking. Time to take first picture.
Step 1. Check device tree
One thing we need for sure is a camera. Hardware is connected but does Linux know about it?
Nowadays, the Linux OS gets information about attached hardware out of a device tree*. This makes the configuration more flexible and does not require recompiling the kernel for every hardware change. NXP board BSP package already contains a device tree file for Basler camera so my only job is to check whatever it is used and enable it if not.
First we will check if the default device tree contains info about my camera. My system is up and running, so I can inspect the device tree by looking around in the sys directory. But first we need to know what are we looking for. If you open Basler device tree source file**, you can see that the camera is attached to the I2C bus:
...
#include "imx8mp-evk.dts"

&i2c2 {
	basler_camera_vvcam@36 {
...
If you now go to imx8mp.dtsi*** you discover that I2C2 is mapped to the address 30a30000.
...
    soc@0 {
	soc@0 {
		compatible = "simple-bus";
		#address-cells = <1>;
		#size-cells = <1>;
		ranges = <0x0 0x0 0x0 0x3e000000>;

		caam_sm: caam-sm@100000 {
			compatible = "fsl,imx6q-caam-sm";
			reg = <0x100000 0x8000>;
		};

		aips1: bus@30000000 {
			compatible = "simple-bus";
			reg = <0x30000000 0x400000>;
                ...
		aips3: bus@30800000 {
			compatible = "simple-bus";
			reg = <0x30800000 0x400000>;
			#address-cells = <1>;
			#size-cells = <1>;
			ranges;

			ecspi1: spi@30820000 {
                        ...
			i2c2: i2c@30a30000 {
				#address-cells = <1>;
				#size-cells = <0>;
				compatible = "fsl,imx8mp-i2c", "fsl,imx21-i2c";
				reg = <0x30a30000 0x10000>;
				interrupts = <GIC_SPI 36 IRQ_TYPE_LEVEL_HIGH>;
				clocks = <&clk IMX8MP_CLK_I2C2_ROOT>;
Lets check if this node is present on the target.
$ cd /sys/firmware/devicetree/base/soc@0/bus@30800000/i2c@30a30000
$ ls
#address-cells  adv7535@3d       clocks      interrupts              name            pinctrl-0      reg     tcpc@50
#size-cells     clock-frequency  compatible  lvds-to-hdmi-bridge@4c  ov5640_mipi@3c  pinctrl-names  status
Our camera is not listed there so its a device tree we need to fix first.
Step 2. Set device tree
To change device tree we need to jump into u-boot. Just restart the board and press any button when you see:
Hit any key to stop autoboot
Check and change boot-loader settings. First lets see what we have:
$ u-boot=> printenv
baudrate=115200
board_name=EVK
...
fastboot_dev=mmc2
fdt_addr=0x43000000
fdt_file=imx8mp-evk.dtb
fdt_high=0xffffffffffffffff
fdtcontroladdr=51bf7438
image=Image
...
serial#=0b1f300028e99b32
soc_type=imx8mp
splashimage=0x50000000

Environment size: 2359/4092 bytes
As expected, u-boot uses the default device tree for our evaluation board. Let’s try to find the one with Basler camera config. I know it should sit in the eMMC, so I will start there.
$ u-boot=> mmc list
FSL_SDHC: 1
FSL_SDHC: 2 (eMMC)

$ u-boot=> mmc part

Partition Map for MMC device 2  --   Partition Type: DOS

Part    Start Sector    Num Sectors     UUID            Type
  1     16384           170392          a5b9776e-01     0c Boot
  2     196608          13812196        a5b9776e-02     83

$ u-boot=> fatls mmc 2:1
 29280768   Image
    56019   imx8mp-ab2.dtb
    61519   imx8mp-ddr4-evk.dtb
    61416   imx8mp-evk-basler-ov5640.dtb
    61432   imx8mp-evk-basler.dtb
    62356   imx8mp-evk-dsp-lpa.dtb
    62286   imx8mp-evk-dsp.dtb
    61466   imx8mp-evk-dual-ov2775.dtb
    61492   imx8mp-evk-ecspi-slave.dtb
We got it! Now its time to set is as a default one. And boot the board again.
$ u-boot=> setenv fdt_file imx8mp-evk-basler.dtb
$ u-boot=> saveenv
Saving Environment to MMC... Writing to MMC(2)... OK
$ u-boot=> boot
You can check in the directory we inspected last time that the camera hardware is present in the device tree.
Step 3. Get the image
Finally, we can get our image (a blob of pixels, to be clear). The easy way would be to connect the screen and run one of the NXP demo apps (though you need to flash your board with the full image to get them). But easy solutions are for people that do have their dev boards somewhere in the reach. Mine is running upstairs, and I prefer to do some extra typing than walking there. First, let’s check data formats supported by our camera.
$ v4l2-ctl --list-formats-ext
ioctl: VIDIOC_ENUM_FMT
        Type: Video Capture

        [0]: 'YUYV' (YUYV 4:2:2)
                Size: Discrete 3840x2160
                        Interval: Discrete 0.033s (30.000 fps)
        [1]: 'NV12' (Y/CbCr 4:2:0)
                Size: Discrete 3840x2160
                        Interval: Discrete 0.033s (30.000 fps)
        [2]: 'NV16' (Y/CbCr 4:2:2)
                Size: Discrete 3840x2160
                        Interval: Discrete 0.033s (30.000 fps)
        [3]: 'BA12' (12-bit Bayer GRGR/BGBG)
                Size: Discrete 3840x2160
                        Interval: Discrete 0.033s (30.000 fps)
We can grab a raw data using following command:
$ v4l2-ctl --set-fmt-video=width=3840,height=2160,pixelformat=YUYV --stream-mmap --stream-count=1 --device /dev/video0 --stream-to=data.raw
<
ls .
data.raw
Copy the raw data file to your development machine and execute this simple python script that will extract the Y component out of the YUV422 image:
# yuv_2_rgb (does not really convert but good enough to check if cam is working)
import sys
from PIL import Image

in_file_name = sys.argv[1]
out_file_name = sys.argv[2]

with open(in_file_name, "rb") as src_file:
    raw_data = src_file.read()
    img = Image.frombuffer("L", (3840, 2160), raw_data[0::2])
    img.save(out_file_name)


# RUN THIS ON YOUR DEV PC/MAC:
$ scp root@YOUR_BOARD_IP:data.raw .
$ python3 yuv_2_rgb.py data.raw data.bmp
$ xdg-open data.bmp
You should see a black and white image of whatever your camera was pointing at.
Step 4. Movie time
Now it is time to get some moving frames. I will use the GStreamer to send the image from the camera to my laptop with 2 simple commands:
# RUN THIS ON YOUR IMX EVALUATION BOARD (replace @YOUR_IP@ with your ip address):
$ gst-launch-1.0 -v v4l2src device=/dev/video0 ! videoconvert ! videoscale ! videorate ! video/x-raw,framerate=30/1,width=320,height=240 ! vpuenc_h264 ! rtph264pay ! udpsink host=@YOUR_IP@ port=5000

# RUN THIS ON YOUR DEV PC/MAC:
$ gst-launch-1.0 udpsrc port=5000 !  application/x-rtp ! rtph264depay ! avdec_h264 ! autovideosink
That’s it. We can see the word through the i.MX eyes/sensors. You can play with the stream settings (image size, frame rate, etc.) or pump the data into some advanced image processing software. Whatever you do, have fun!
* if you are interested in the device trees, there are some great materials from Bootlin
** at the moment of writing the DTS for Basler camera can be found eg. here but since NXP is busy with de-Freescalization I expect it to be moved to some imx folder in the future
*** device trees are constructed in a hierarchical way and for our board imx8mp.dtsi is the top most one


You must be logged in to post a comment.